I watched someone overheat a crucible trying to melt stainless scrap for casting.
He didn’t realize it was the wrong furnace setup, and by the time we stopped him, the crucible liner had cracked.
That kind of oversight can turn into real downtime fast.
I’ve helped manufacturers design casting workflows that avoid waste, rework, and injury. If you’re in a shop setting, the right process matters more than ever.
This article gives you a full, step-by-step breakdown of how to cast metal—from material handling and melting to mold pouring and cleanup.
So, let’s break it down!
Step #1: Plan Your Casting Project
When taking on a casting job, don’t just think about molten metal, think about the entire chain of events that has to go right.
Planning upfront gives every step a clear direction and helps prevent waste down the line.
Define the Casting Approach
- Choose the Casting Method Based on Volume: Sand casting works well for short runs or prototypes, while die casting fits larger production runs. The method you choose impacts tooling, materials, and labor.
- Review or Create a Part Drawing: A detailed drawing with measurements, tolerances, and wall thickness is the foundation for every decision that follows. It helps guide mold design and material choice.
- Select the Metal That Matches the Application: Metals behave differently depending on the end-use of the part. For example, aluminum is lightweight and corrosion-resistant, while cast iron handles heavy stress.
Prepare for Execution
- Estimate the Total Material Required: It’s important to calculate how much metal will be needed, including allowances for gates, risers, and inevitable scrap. This keeps your inventory and purchasing tight and predictable.
- Map Out the Pouring and Venting Plan: Before the mold is made, you’ll need to figure out where the molten metal will flow and where the trapped air will escape. A clear flow path reduces turbulence and casting defects.

Step #2: Gather Materials and Tools
Before any melting starts, double-check that everything is ready and within arm’s reach.
Missing even one item mid-process can stall the whole job or cause safety issues.
Choose the Right Inputs
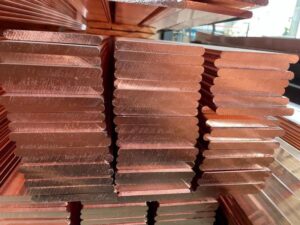
- Select the Right Metal for the Job: The choice depends on the part’s function, strength needs, and how it will be used. Metals like aluminum, brass, and bronze each offer different casting qualities. MachMaster offers all three options, so you can match material to performance needs without guesswork.
- Choose a Suitable Furnace Type: Crucible furnaces are commonly used for non-ferrous metals, while induction furnaces handle higher temperatures and larger batches. The furnace must match the volume and type of metal being cast.
- Prepare a Reliable Mold Material: Sand, ceramic shell, and metal molds each suit different casting methods. Mold selection affects surface finish, part detail, and cooling time.
Set Up for Safe Handling
- Gather Crucibles, Tongs, and Pouring Tools: Handling molten metal safely means using proper lifting and pouring tools designed to take the heat. These tools should be heat-resistant, stable, and easy to maneuver under pressure.
- Check for Proper Ventilation and Workspace Setup: Casting generates heat, smoke, and sometimes toxic fumes. A well-ventilated, clutter-free area reduces risk and makes the entire process smoother.
- Stock Up on Safety Gear and Fire Protection: Face shields, gloves, aprons, boots, and a fire extinguisher should be ready before anything is heated. This is one area where cutting corners is never worth the risk.

Step #3: Create the Mold
This is where your part starts to take shape, literally.
The mold is the framework that everything depends on, so getting it right is worth the extra effort upfront.
Select and Prepare the Mold Type
- Pick the Right Mold Type for Your Method: Sand molds are great for flexible, low-cost casting, while ceramic shells are ideal for detailed parts. Permanent metal molds work best for repeat production with tight tolerances.
- Design for Shrinkage and Metal Flow: As metal cools, it shrinks, so the mold cavity needs to be slightly oversized. Flow paths and risers also help prevent air pockets and incomplete fills.
Optimize for Casting Success
- Include Draft Angles and Vent Channels: Slight tapers make it easier to remove the casting without damaging it. Vents give trapped gases a way out during the pour, reducing surface defects.
- Check Surface Quality and Mold Integrity: Cracks, moisture, or loose material inside the mold can ruin the final part. A clean, compact mold produces a better finish and holds shape under heat.
Step #4: Preheat and Prepare the Mold
This step might seem small, but I’ve learned it makes a huge difference. A warm, well-prepped mold helps avoid everything from steam explosions to weak castings.
Remove Moisture and Regulate Heat
- Dry Out Any Moisture in the Mold: Even a small amount of water can flash to steam and cause dangerous blowback. Heating the mold gently beforehand helps drive out any leftover moisture.
- Bring the Mold to the Right Temperature: Preheating improves metal flow and reduces temperature shock when the molten metal hits the surface. Each mold material has its own sweet spot depending on the casting metal.
Final Setup and Pour Readiness
- Apply a Mold Release or Coating: A light layer of graphite or commercial mold release helps the part separate cleanly after solidifying. It also protects the mold surface from wear and repeated heat exposure.
- Secure the Mold Position and Seal Gaps: Make sure the mold halves are clamped tightly and aligned correctly. Any gaps can lead to leaking metal or flashing along the parting line.
- Double-Check Vents and Pouring Channels: Air and gases need a way out during the pour, or you risk bubbles and incomplete fills. A quick inspection before pouring helps avoid rework later.

Step #5: Melt the Metal
Melting metal always gets people’s attention.
But it’s not about drama, it’s about control. If the temperature, timing, or handling is off, you’ll feel it in the quality of the casting.
Prepare and Manage the Melt
- Choose the Right Furnace for Your Setup: A crucible furnace works well for small batches and non-ferrous metals like aluminum or bronze. For high-volume or steel casting, induction or electric furnaces are better suited.
- Load the Metal in Small, Even Batches: Cutting the metal into manageable chunks helps it melt consistently without hot spots. It also reduces the risk of overloading the crucible.
- Monitor the Temperature Closely: Use a reliable thermometer or pyrometer to track the melt. Staying just above the melting point gives better flow while protecting the metal’s integrity.
Clean, Treat, and Maintain Safety
- Skim Off Slag and Surface Impurities: As the metal heats, impurities rise to the top and form a crust. Skimming it off before pouring keeps the final casting cleaner and stronger.
- Add Degassing or Fluxing Agents if Needed: Some metals, like aluminum, absorb gas that creates bubbles or weak spots. Adding flux or degassing tablets helps reduce porosity and surface defects.
- Keep a Steady Hand and a Safe Work Area: Melting metal isn’t something you multitask around. Keep distractions to a minimum and always have your PPE and tools ready in advance.

Step #6: Pour the Metal into the Mold
Pouring is one of those moments that looks simple, until you’re the one holding the crucible.
Every movement counts, and a steady, clear plan makes all the difference.
Set Up for a Clean Pour
- Position the Mold on a Stable Surface: Set the mold on a heat-resistant surface like packed sand or firebrick. Stability is key, because even a slight wobble can ruin the pour or cause a spill.
- Use a Controlled, Continuous Pour: Start pouring in a smooth stream, not too fast and not too slow. A steady pour reduces splashing and gives the metal time to fill every corner of the mold.
Manage Venting and Fill Level
- Let Air Escape Through Vents: As the mold fills, vents allow trapped air and gases to flow out. Without this release, you risk getting bubbles, short pours, or cold shuts.
- Fill the Mold to the Top or to a Riser Point: Once the metal reaches the proper level, stop the pour cleanly to avoid overflow. Some molds use risers to hold extra metal for shrinkage compensation as the part cools.

Step #7: Allow the Metal to Cool and Solidify
I used to think once the pour was done, the hard part was over.
But cooling is where the metal decides what kind of part it’s really going to be: strong and clean, or full of hidden flaws.
Control the Cooling Environment
- Let the Mold Sit Without Disturbance: Movement or vibrations during cooling can throw off the internal structure or shift the shape. Keeping the mold in place helps everything settle just the way it should.
- Follow the Cooling Rate That Matches the Metal: Each metal has a preferred way of cooling. Slowing things down too much or speeding them up can cause stress lines, cracks, or even warping inside the part.
- Use Insulation for Controlled Cooling: Covering the mold with sand, ash, or thermal blankets helps hold heat longer. This works well for thicker parts that need time to cool evenly from the core out.
Monitor for Final Solidification
- Watch the Risers for Shrinkage Behavior: As the metal contracts, it pulls extra material from the risers to fill in any gaps. If that flow gets cut off too soon, it can leave pits or sunken areas in the casting.
- Wait Until the Casting Reaches Room Temperature: Even if the surface looks solid, the inside might still be too soft to handle. Giving it time to cool completely avoids chips or cracks during removal.
Step #8: Remove the Casting from the Mold
I always look forward to this part, it’s like opening a package you’ve been waiting to unwrap.
But I’ve also learned to be careful here, because a great casting can still get damaged if you rush the removal.
Release the Casting with Care
- Break Away the Mold Material Carefully: For sand casting, the mold is usually broken apart by hand or with light vibration. Ceramic shells or investment molds may need water blasting or mechanical knocking.
- Support the Casting During Removal: Larger parts can be heavy and fragile at the same time. Supporting the casting from underneath helps prevent cracks or sudden drops as it comes free.
Clean and Check Before Finishing
- Clear Off Residual Mold Material: After the casting is removed, leftover sand, shell, or debris should be brushed or blasted off. This helps reveal the part clearly and prepares it for finishing.
- Inspect for Surface Defects or Incomplete Fills: Now’s the time to check for cracks, bubbles, or short pours before you move forward. Spotting issues early lets you catch problems while they’re still manageable.

Step #9: Trim and Finish the Casting
I’ve always thought of this step as the moment where a rough metal shape becomes a usable product.
It’s not just cleanup, it’s about making the part ready for real-world use.
Remove Excess Material and Refine the Surface
- Cut Off Sprues, Gates, and Risers: Use a bandsaw, grinder, or cutoff wheel to remove the extra metal where the molten flow entered and exited the mold. These leftover bits are part of the process, but they don’t belong on the final part.
- Grind and Smooth the Contact Points: After cutting, there will be rough spots that need smoothing out. A quick pass with an angle grinder or file evens things out and gives the surface a clean finish.
- Deburr Sharp Edges or Mold Lines: Flash and burrs often appear at mold seams or junctions. These need to be knocked down for safety, performance, and a more professional look.
Final Finishing and Inspection
- Surface Blast or Polish as Needed: Depending on the part’s end use, you might sandblast it for texture or polish it to a shine. MachMaster offers finishing services that help you get the right surface quality, whether you need a functional matte or a polished final look.
- Machine to Final Dimensions if Required: If the part needs tight tolerances or exact fit, you’ll want to take it to the mill or lathe. Machining helps hit exact specs that casting alone can’t always deliver.
- Inspect and Approve Before Moving On: Give the part a once-over for cracks, inclusions, or any defects that might’ve been missed earlier. This final check helps catch small issues before the part reaches your client or assembly line.
Conclusion
Casting metal isn’t guesswork, it’s a process. And now you’ve got the whole roadmap.
You’ve seen where to begin, what tools to use, how to melt, pour, cool, and finish strong.
If it felt complex before, I hope it feels clear now.
So, what’s holding you back from your first pour?
MachMaster makes it easy to go from sketch to finished part.
Contact us today. We’re ready when you are.
More Guides and Tips to Explore
Not quite what you’re looking for? Explore our wider product range for more choices:
- Anodizing Service
- Cnc Milling Service
- Cnc Turning Service
- Injection Molding Service
- Cnc Machining Service
We’ve got more for you! These articles provide more tips and guidance to keep you on track:
Still haven’t found what you’re looking for? Don’t hesitate to contact us. We’re available around the clock to assist you.