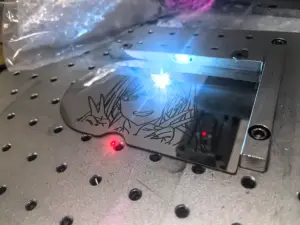

Acrylic, also known as PMMA, is commonly used for transparent covers, panels, enclosures, and other custom plastic components. CNC machining can produce accurate holes, slots, profiles, and complex shapes from acrylic sheets and blocks.
However, acrylic does not machine exactly like metal. Too much cutting heat can soften the material, chips can stick to the tool, and poor clamping may cause cracks or surface damage.
This guide covers the material choices, cutting tools, machining methods, and finishing considerations that matter when CNC machining acrylic.
1. Choose the Right Acrylic Material
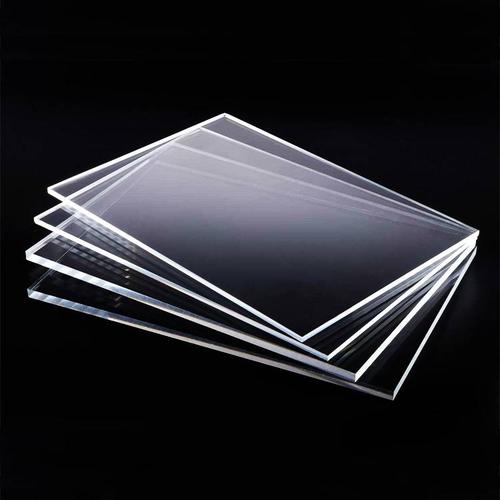
Two common types of acrylic sheet are cast acrylic and extruded acrylic. Both can be CNC machined, but their processing characteristics may differ.
Cast Acrylic
Cast acrylic is produced by casting liquid monomer between molds. It is commonly selected for machined components that require good optical appearance and further edge polishing.
Typical considerations:
- Available in a range of sheet thicknesses and colors
- Often suitable for machining and subsequent polishing
- Material properties and residual stress depend on the grade and manufacturing process
Extruded Acrylic
Extruded acrylic is produced by pushing material through a die to form continuous sheets or profiles.
Typical considerations:
- Often available at a competitive material cost
- Can be suitable for less demanding machined components
- Heat and cutting conditions need careful control to avoid softening or material buildup on the tool
Neither type is automatically right for every project. The choice should depend on the part geometry, thickness, optical requirements, dimensional needs, and finishing process.
If transparency or polished edges are critical, identify those requirements before selecting the material.

2. Select Suitable CNC Cutting Tools
Tool geometry has a major effect on acrylic machining. The aim is to cut and remove chips cleanly rather than rub the material and generate excessive heat.
Single-Flute End Mills
Single-flute cutters are commonly used for acrylic routing and milling. Their open flute space helps remove chips and can reduce heat buildup when the tool and cutting conditions are suitable.
They are often considered for:
- Profile cutting
- Slots and pockets
- Contour machining
- General acrylic sheet machining
Two-Flute End Mills
Two-flute cutters can also be used for acrylic, depending on the tool geometry, machine, and part requirements. Sharp cutting edges and effective chip evacuation are important.
Keep Tools Sharp and Clean
Dull or damaged cutting edges can rub against the material, increase heat, and leave poor surface quality. Acrylic chips may also accumulate around the tool if chip evacuation is inadequate.
Check the tool condition and remove accumulated chips when needed.
3. Control Heat During Acrylic Machining
Heat is one of the main challenges when machining acrylic.
If the cutting zone becomes too hot, acrylic may soften, smear, or stick to the cutting tool. The result can include rough edges, melted chips, and damaged surfaces.
Useful ways to manage heat include:
- Use sharp tools designed for plastic machining.
- Select cutting speeds and feed rates appropriate for the tool and material.
- Avoid allowing the tool to rub against the workpiece.
- Maintain effective chip evacuation.
- Use suitable cooling or air assistance where appropriate for the machine and application.
- Check the cut surface and chips during initial trials.
Compressed air can help remove chips from the cutting area, but the setup should be suitable for the machine, material, and workshop safety requirements.
How Can You Recognize Excessive Heat?
Look for signs such as:
- Chips sticking to the cutting tool
- Softened or smeared edges
- Melted material around slots or holes
- A rough or cloudy machined surface
If these problems appear, review the tool condition, cutting parameters, chip evacuation, and workholding rather than changing spindle speed alone.
4. Set Suitable Cutting Parameters
There is no single spindle speed, feed rate, or cutting depth that works for every acrylic part.
The appropriate settings depend on:
- Cutter diameter and number of flutes
- Tool geometry and material
- Machine spindle capability and rigidity
- Acrylic type and thickness
- Part geometry and workholding
- Required surface finish and production conditions
For a new material or tool combination, begin with the tool manufacturer’s recommendations and conduct controlled machining trials.
Observe the chips and machined surface. Cleanly formed chips and a stable cutting process are generally better signs than fine powder, excessive heat, or melted material.
Use Multiple Passes for Thick Material
For thicker acrylic stock or deeper features, multiple cutting passes may provide better control than removing too much material in one operation.
The appropriate depth per pass depends on the cutter, machine, workpiece support, and material. Avoid treating one cutting-depth figure as a universal rule.
5. Prevent Cracking and Deformation
Acrylic can crack when excessive clamping pressure, vibration, internal stress, or machining forces act on the part.
Use Even Workholding Pressure
Support the workpiece properly and avoid concentrated clamping pressure. Suitable soft protective pads may help prevent surface marks, but they must not allow the material to move during machining.
Vacuum workholding can be useful for some flat acrylic parts when the fixture provides adequate support and sealing.
Maintain Support During Cutting
Thin panels and narrow features can vibrate or move if they are not adequately supported.
Consider the following:
- Keep enough material around the part during early machining stages.
- Avoid unsupported thin sections where possible.
- Use a machining sequence that maintains rigidity until the final contour is cut.
- Check that the workpiece remains secure throughout the operation.
Consider Internal Stress
Material stress can contribute to deformation or cracking during and after machining. Material grade, sheet production method, cutting sequence, and part geometry all matter.
For parts with demanding dimensional or optical requirements, discuss material selection and machining sequence before production.
Communicate with Machmaster
Have a CAD design ready? Upload your STEP files for a free DFM review and instant quote within 24 hours.
6. Achieve a Better Acrylic Surface Finish
CNC machining can produce the required part geometry, but the machined surface and edges may not be optically clear straight off the machine.
The required finishing method depends on the part shape, appearance, and application.
Mechanical Polishing
Mechanical polishing uses abrasive steps followed by suitable polishing compounds to improve surface appearance.
It can be considered for:
- Visible edges
- Flat surfaces
- Selected curved or complex areas
- Parts requiring a smoother, clearer appearance
The polishing sequence depends on the initial surface condition and the required finish.
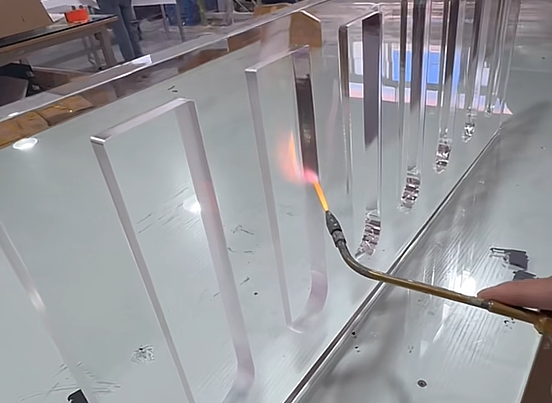
Flame Polishing
Flame polishing uses controlled heat to smooth suitable acrylic edges. It is generally more appropriate for selected accessible edges and geometries.
It is not suitable for every part. Excessive heat or an unsuitable application can cause bubbles, distortion, or stress-related problems.
For parts with tight dimensional requirements, complex geometry, or optical specifications, confirm the finishing method before production.
Specify the Required Finish Clearly
When requesting a quote, identify:
- Which surfaces need to be transparent or polished
- Whether the machined edges can remain matte
- Any visible-surface requirements
- Whether dimensions must be maintained after finishing
This helps the manufacturer assess the machining and finishing sequence more accurately.
7. Common Acrylic CNC Machining Problems
| Machining Problem | Possible Causes | What to Review |
|---|---|---|
| Melted or smeared edges | Excessive heat, dull tool, poor chip removal | Tool sharpness, feed and speed, chip evacuation |
| Chips sticking to the cutter | Heat buildup or unsuitable tool geometry | Cutter design, cutting conditions, chip removal |
| Cracks during machining | Excessive clamping, vibration, internal stress | Workholding, material condition, machining sequence |
| Cloudy or rough surfaces | Tool marks, vibration, heat, or unsuitable finishing | Tool condition, machine setup, finishing requirements |
| Dimensional variation | Workpiece movement, heat, tool deflection | Workholding, machining sequence, temperature, tool setup |
| Poor hole or pocket finish | Chip accumulation or inadequate tool access | Chip evacuation, tool selection, machining strategy |
The same visible problem can have more than one cause. Check the material, tool, machine setup, and workholding together before making process changes.
8. What to Specify When Ordering CNC Machined Acrylic Parts
If you are sourcing custom acrylic components, provide the information needed to evaluate both machining and appearance requirements.
Useful details include:
- CAD files or drawings: Provide 2D drawings or 3D models with dimensions and critical features.
- Material type: Specify cast or extruded acrylic if required.
- Color and transparency: Identify clear, colored, translucent, or other appearance requirements.
- Quantity: State prototype quantities and expected production volume.
- Critical tolerances: Highlight dimensions that affect fit, assembly, or function.
- Surface finish: Identify surfaces and edges that need polishing or a particular appearance.
- Application: Explain how the part will be used and whether it has optical, environmental, or mechanical requirements.
Clear specifications help the manufacturer select an appropriate material and machining approach.
Custom Acrylic CNC Machining
Machining acrylic successfully requires more than selecting a cutting tool. Material choice, workholding, heat control, chip removal, machining sequence, and finishing all affect the final part.
MachMaster provides custom CNC machining for acrylic (PMMA) parts based on customer drawings and project requirements. If you are planning a custom acrylic component, send us your CAD files, material preferences, quantity, and finish requirements for review.
Communicate with Machmaster
Have a CAD design ready? Upload your STEP files for a free DFM review and instant quote within 24 hours.