When I first started designing parts, I didn’t pay much attention to tolerances.
If it looked good on the screen, I figured it would work just fine.
But that didn’t happen.
One part wouldn’t close. Another had a weird gap. Some fit at first—then cracked later.
At first, I blamed the factory. But after a few projects fell apart, I realized the truth.
The problem was my design. More specifically, my tolerances.
So I went back. I talked to machinists, read up on casting standards, and compared real parts to my CAD models.
It was frustrating at first—but that’s how I finally learned what tolerances really mean and where they matter most.
If you’re designing or ordering die cast parts, I want to help you skip that pain.
In this article, I’ll walk you through standard die casting tolerances—what’s normal, what to ask for, and how it affects part quality, fit, and function.
You’ll get simple, clear answers so you can make better decisions and avoid the mistakes I made.
So let’s begin!
1. How Die Casting Tolerances Are Measured
When I first got into die casting, I thought checking tolerances was someone else’s job.
But after a few parts didn’t fit—one too tight, one too loose—I realized I needed to understand how tolerances are measured myself.
Here’s the simple process most manufacturers follow:
- Step #1: Check the Drawing: Tolerances are written on the technical drawing. You’ll see them listed next to a feature, or in a general tolerance block at the bottom. If there’s nothing written, the factory will use their default tolerance range. That’s risky if your part has tight fits.
- Step #2: Understand the Units: Tolerances are measured in millimeters or inches. You might see something like ±0.1 mm or ±0.005 in. Those small numbers matter more than they seem.
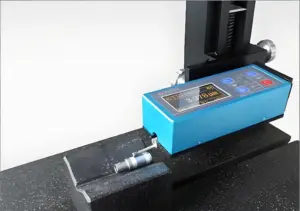
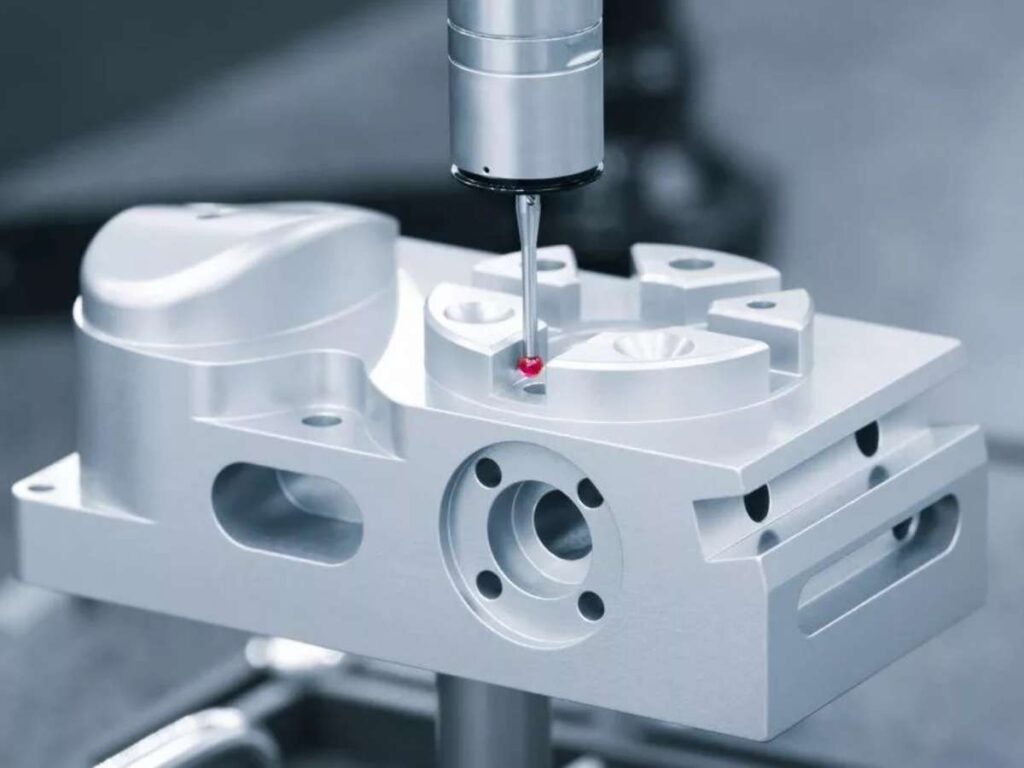
- Step #3: Use the Right Tools:
- Step #4: Match the numbers: They check if the measured size falls within the allowed range. Let’s say your spec is 20 mm ±0.1 mm. That means anything from 19.9 mm to 20.1 mm is okay.
- Step #5: Record the Results: Once the parts are measured, the factory logs the results. Some send you a full report. Others just flag the issues.
I used to skip over this stuff. I thought close was close enough.
But a bad fit can ruin the whole assembly.
Now I always ask: how are you checking the tolerances?
You should too.
2. Factors That Influence Die Casting Tolerances
When I started working with die casting, I thought tolerances were set once and stayed that way.
But I was wrong.
Even when the design stayed the same, the final parts didn’t always match.
That’s because tolerances depend on more than just the drawing.
Here are the key factors that affect them:
Material Type
Different metals shrink and move in different ways.
- Zinc offers higher dimensional accuracy. It flows well and is less likely to change shape.
- Aluminum is more likely to shrink and warp during cooling.
- Magnesium is somewhere in between.
If your part has tight fits, zinc is easier to work with.
Aluminum may need a bit more room in your design to stay within range.
Die Design and Tooling Quality
The condition and layout of the mold really matter.
- Worn molds can throw off your measurements.
- A poor cooling layout might cool the part unevenly.
- Misalignment or lack of maintenance leads to trouble fast.
I’ve had parts fail because the mold hadn’t been cleaned properly.
That delay cost me both time and budget.
Casting Method
There are two common die casting methods:
- Hot chamber casting: Used for zinc and magnesium. These machines offer tighter tolerances.
- Cold chamber casting: Used for aluminum. The process is slower and less stable, which can lead to more variation.
I once called for tight tolerances on an aluminum part without knowing it was cast in a cold chamber.
The results weren’t great.
Part Geometry
The shape of the part affects tolerance results.
- Thin walls
- Deep pockets
- Sharp corners
These features tend to shift more as the metal cools.
If your part is complex, looser base tolerances might be the safer starting point.
Machine Capabilities and Process Control
Some factories have better setups than others.
- Injection pressure must stay consistent.
- Equipment needs stable temperatures.
- Automation and digital tracking improve repeatability.
One supplier I worked with used automated controls and gave me reports after each run.
Their parts were some of the most consistent I’ve ever received.
So if things aren’t lining up, it might not be your drawing.
Sometimes it’s the tools, the metal, or the shape itself.
Understanding these factors helps you make smarter choices from the start.
3. Typical Standard Tolerances in Die Casting
When I started reviewing die cast drawings, I kept running into the same issue: guessing what was “acceptable.”
Sometimes the parts came out just right. Other times, they didn’t fit at all—even though the drawing looked fine.
If you’ve ever felt unsure about what tolerances to allow, you’re not alone.
This table below breaks it down clearly—based on real numbers I’ve used in actual projects.
| Feature | Typical Tolerance | Notes |
| Small features (<25 mm) | ±0.05 mm | Works well for precise details and small components |
| Medium features (25–75 mm) | ±0.10 mm | Common for most housing parts or medium-sized shapes |
| Large features (>75 mm) | ±0.20 mm | More room for variation as part size increases |
| Hole diameter | ±0.075 mm | Often needs secondary machining for tight fits |
| Hole position | ±0.15 mm | May vary more if far from injection point |
| Flatness (per 100 mm) | ±0.10 mm | Thinner or wider parts may warp slightly as they cool |
| Wall thickness | ±10% of nominal | Example: a 2 mm wall = 1.8 mm to 2.2 mm |
| Thin wall caution | — | Too thin can cause porosity or incomplete filling (misruns) |
Use this chart as a reference when designing, sourcing, or reviewing your die cast parts. It’ll help you choose realistic tolerances—so your parts work, fit, and don’t hold up production later.
4. Standard Tolerance Classes
The first time I got a casting quote back with the word “Commercial Tolerance,” I had no idea what that meant.
Was it good? Bad? Average?
I didn’t want to sound clueless, but I also didn’t want to risk parts that wouldn’t fit.
If you’ve ever felt that way, don’t worry.
Tolerance classes help everyone stay on the same page.
They tell you how tight or loose a part’s dimensions can be.
There are a few main standards you should know:
NADCA Tolerance Standards (North America)
If you’re working with a supplier in the U.S. or Canada, chances are they follow NADCA 2015. It’s the guideline from the North American Die Casting Association. It includes three main classes:
- Precision: For parts that need very tight control. Example: ±0.05 mm for a 25 mm feature.
- Intermediate: A middle-ground used for many functional parts. Example: ±0.13 mm for 25 mm.
- Commercial: The loosest range. Better for parts that don’t need high accuracy. Example: ±0.25 mm for 25 mm.
I once chose Precision tolerances for every feature. The quote came back way over budget.
Lesson learned: use tight specs only where you need them.
ISO 8062-3 Standard (Global)
This is the most common international standard for cast parts. It uses something called DCTG, which stands for Dimensional Casting Tolerance Grade.
Here’s a simple breakdown:
- DCTG 5: Very tight tolerance. Best for small parts or machined surfaces.
- DCTG 9: More flexible. Works well for general-purpose parts.
The higher the number, the looser the tolerance.
So if you see DCTG 11, expect more size variation than DCTG 6.

DIN, JIS, and Other Standards
If you’re working with suppliers in Europe or Asia, you might come across DIN (Germany) or JIS (Japan) standards. They follow the same idea: different levels of tolerance, based on part size and application.
You don’t need to memorize every chart.
But knowing which class fits your part can save you time, cost, and headaches down the line.
I learned that the hard way—so you don’t have to.
If you’re working on a prototype or a cosmetic cover, commercial tolerances usually do the job. For functional parts that need a tight fit—like those with mating holes or sealing features—go for precision.
Some suppliers, such as MachMaster, offer both standard commercial tolerances and precision-class options based on customer needs, with additional CNC post-machining available when tighter tolerances are required.
Choosing the right class saves time, money, and a whole lot of back-and-forth during production.

5. Common Mistakes in Specifying Tolerances
I made a lot of mistakes early on when designing die cast parts.
One of the biggest? Asking for tight tolerances just because they sounded better.
If you’re starting out, or even if you’ve done a few projects, here are common errors to watch out for:
Over-Specifying Tight Tolerances
This one is more common than you’d think.
Yes, tighter tolerances mean more control—but at a cost.
- Increases tooling and production cost
- May require extra machining, even if avoidable
- Slows down lead time and raises rejection rates
I once labeled nearly every feature with ±0.01 mm. The quote came back double what I expected.
And honestly, most of those surfaces didn’t need that level of precision.
Ignoring Manufacturing Capabilities
Not every supplier can hit ultra-tight tolerances.
Just because it’s on the drawing doesn’t mean it’s doable.
Before you lock in numbers like ±0.01 mm, always check:
- What the supplier’s machines can actually hold
- If they provide Cp or Cpk values (these show how stable and capable their process is)
If they can’t share that info, it might be a red flag.
Skipping Draft Angle Adjustments
A draft angle helps the part release smoothly from the mold. Without it, the part can stick or warp during ejection.
General rule:
- Use 1° to 3° of draft for most walls
- Steeper draft for deeper cavities or textured surfaces
I’ve seen parts jam in the mold just because someone forgot to add draft. That’s an expensive fix.
Not Accounting for Tolerance Stack-Up
If you’re working on an assembly with multiple cast parts, this one’s key.
Tiny variations can build up and cause big issues.
For example:
- A housing made of three cast sections
- Each piece is off by just 0.1 mm
- But together, you get a 0.3 mm shift—which might stop holes from lining up
Always check how tolerances interact in the full assembly.
It takes a bit more time, but it can save your whole project.
Tip: Discuss tolerance expectations early with your supplier.
At MachMaster, engineers review drawings and offer DFM suggestions to help you balance accuracy with cost efficiency.
A simple conversation up front can save you from a costly fix later.
6. Design Tips for Achieving Consistent Tolerances
I used to think that once I finished my part design, the hard part was over.
But I quickly found out: how you design affects how well the part is made.
A few early mistakes taught me that even small design choices can mess with tolerances.
If you want more consistent results, here are some tips that helped me—and can help you too.
Work with Your Supplier Early
One time, I sent a full design to a casting shop without asking for feedback. They spotted 3 problems that could’ve been fixed before the mold was cut.
Now I always ask for a DFM review: Design for Manufacturability.
Your supplier can help with:
- Where the metal should flow
- How the mold cools
- What changes make the part easier to cast
Getting their input early saves a lot of trouble later.
Keep Geometry Simple
Complex shapes sound cool. But they don’t always cast well.
I try to avoid:
- Thin ribs
- Deep holes
- Long, skinny walls
- Undercuts that need sliding cores
The simpler the shape, the easier it is to hold the right size.
Use Ribs and Bosses the Smart Way
Ribs and bosses help strengthen the part.
They also help the mold cool evenly.
But don’t add too many.
That can cause dents, called sink marks.
I’ve done it. Didn’t look good.
Don’t Make Every Surface Perfect
Not every face of your part needs to be exact.
Try this:
- Tight tolerances where parts fit together
- Looser tolerances on smooth or hidden areas
It cuts down cost and makes the job easier for everyone.
Use Machining for the Really Important Stuff
Some features just need to be extra precise.
That’s okay.
Use machining after casting for:
- Holes with threads
- Bearing seats
- Pin locations
I used to fight for everything to come out perfect from the mold.
Now I know—mixing casting with some machining works way better.
These small changes helped me get better parts.
They’ll help you too.
Conclusion
That one project I over-toleranced? It taught me everything in this guide.
Now you know what standard die casting tolerances are, how they’re measured, what affects them, and how to set them right. You don’t need to get it perfect—just smart.
Use what you’ve learned to design with purpose, reduce cost, and get better results.
You’ve got the tools. You’ve got the confidence. Start now.
Need help applying this to your next project? Contact us today.
More Guides and Tips to Explore
Not quite what you’re looking for? Explore our wider product range for more choices:
- Anodizing Service
- Cnc Milling Service
- Cnc Turning Service
- Injection Molding Service
- Cnc Machining Service
We’ve got more for you! These articles provide more tips and guidance to keep you on track:
Still haven’t found what you’re looking for? Don’t hesitate to contact us. We’re available around the clock to assist you.


