I wasn’t born knowing how to run machines. In fact, the first time I stood near a stamping press, I froze.
It was loud. Fast. And honestly, a little scary. I thought, “If I touch that, I’ll break something.” So I stood back and watched.
But over time, I got curious. I started asking questions. I learned how to load the material, how to line up the die, how to check if a part came out right. I made a lot of small mistakes—but that’s how I figured it out.
If you’re reading this, maybe you’ve felt the same. You want to learn how metal stamping works—step by step. No fluff. No guesswork. Just the real process.
That’s what this guide is here for.
You’ll learn:
- How to prepare your raw material
- How to set up your die and machine
- How to run a test safely
- How to stamp your parts the right way
- And how to check your parts and clean your tools when you’re done
Whether you’re running a factory, designing a part, sourcing stamped components, or working on a class project—this guide will help you do it right.
Let’s jump in!
Step #1: Prepare the Raw Material
Stamping doesn’t begin at the press.
It starts with the raw material.
I once skipped this step—just handed off a metal sheet and hoped for the best. The result? Cracks, misaligned cuts, and wasted time. That’s when I realized: prepping your material is step one for a reason.
Choose the Right Material
The material you pick depends on what your part needs to do.
Some common metals used in stamping include:
- Cold-rolled steel: strong and smooth
- Aluminum: light and easy to form
- Stainless steel: durable and rust-resistant
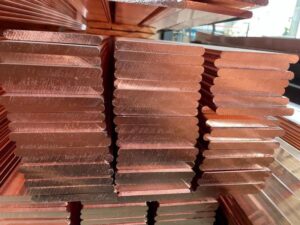
- Copper: soft and great for electrical parts
Each has different strength and thickness properties. You need to match those to your part design. Too thick, and the press struggles. Too soft, and the part might not hold its shape.
Cut the Material to Size
Once you’ve got the right metal, cut it to the right size.
This helps the press work smoothly and prevents waste.
Here’s how you might cut it:
- Shearing: quick straight cuts
- Laser cutting: clean and precise
- Blanking: common in high-volume setups
If you’re working with a coil, unroll and flatten it before cutting. If it’s in sheet form, measure carefully so it fits your die setup.
Clean the Surface
Even a thin layer of oil or dust can mess up your results.
I’ve seen small spots of grease leave deep marks in finished parts.
Clean the metal:
- Use degreasers to remove oil
- Try ultrasonic cleaners for fine debris
- Wipe manually if that’s all you have
Make sure the surface is clean and dry before moving forward.
Remove Burrs and Flatten
Cutting often leaves burrs: sharp, rough edges that can damage the die or throw off alignment.
To fix that, use tools like:
- Deburring tools
- Sanding blocks
- Grinding wheels (for thicker sheets)
Then check the piece for flatness. Warped or bent metal won’t sit right in the press and can cause errors during stamping.

Step #2: Set Up the Stamping Die
Once your material is prepped, it’s time to set up the stamping die.
This is where things start to take shape—literally. But I’ll be honest, the first time I mounted a die, I rushed it. It looked fine at a glance. I skipped the checks. The first press came down, and the part bent in all the wrong ways. That mistake taught me one thing: take your time with the setup.
Know Your Die Type
Before you touch the press, figure out what kind of die you’re using. Each one works a little differently.
Here are the most common types:
- Single-hit die: One press, one shape. It’s used for basic cuts or forms.
- Progressive die: Moves the metal through several steps in one run. Great for complex parts.
- Compound die: Cuts and forms the part at the same station, during one press.
Pick the right die for the job. That decision affects how you mount and align it.
Mount the Die on the Press
The die sits on the press bed. You’ll usually use clamps or bolts to lock it in place. This needs to be solid—any loose movement can ruin the part or damage the press.
Then, place the upper die on the ram (the moving part of the press). It needs to match up with the lower die perfectly.
Take your time with this. Don’t guess. Use guides, markings, or previous settings if you have them.
Align the Die Properly
This part matters more than people think. I once eyeballed the alignment and hit the start button. Big mistake. The press jammed. The die chipped. We lost hours.
Here’s how to do it right:
- Use feeler gauges to check spacing between top and bottom dies
- Look at visual guides or reference points on the tool
- Make small adjustments until both parts line up cleanly
This step helps the press apply pressure evenly. If it’s off, your parts will be too.
Add Lubrication (If Needed)
Some dies need lubricants to reduce friction. This helps the metal slide and form without tearing.
Check your part spec or talk to the press operator. Use the right type and amount. Too much can cause slipping. Too little can damage the die.

Step #3: Set Up the Stamping Machine
Once your die is in place, the next step is setting up the stamping machine itself. This is where things get real.
I used to think hitting the start button was the hard part. It’s not. The real work is in the setup. Miss one setting, and you’re either smashing your die or barely forming your part. I’ve done both. So let’s go slow and get it right.
Choose the Right Press Type
Start by selecting the right kind of press. Your choice depends on the part’s shape, depth, and how many you need to make.
There are 2 main types:
- Mechanical press: Uses a flywheel and crank system. It’s fast and great for shallow parts.
- Hydraulic press: Uses fluid pressure to move the die slowly and with more control. Better for deep-draw or complex shapes.
At MachMaster, we typically use hydraulic presses for deep-draw stamping and mechanical presses for high-speed runs. Proper calibration here is key to avoiding tool wear or inconsistent parts.
Adjust the Machine Settings
Now it’s time to fine-tune the machine. Don’t skip this. Each part needs different settings.
Here’s what to check:
- Stroke length: This controls how far the press moves. Too short, and it won’t form fully. Too long, and you waste time or risk damage.
- Tonnage: This is the amount of force the press applies. Calibrate it carefully.
- Not enough force = incomplete parts
- Too much force = bent tools or broken dies
- Feed rate: If you’re feeding coil material, make sure it moves at the right speed between hits. Too fast or slow can throw off timing and waste material.
Always test a few parts before going full speed.
Check Safety Devices
Every press should have safety systems in place.
Before you run the machine, check these:
- Safety guards: These protect you from moving parts
- Interlocks: Stop the machine if a door or cover is open
- Emergency stop button: Make sure it works
Safety might feel like a hassle, but it’s saved me more than once.
Step #4: Perform a Test Run
Now that your machine and die are set, it’s time to run a few test pieces.
Don’t rush into full production just yet. I’ve done that before—and paid for it. One press run with the wrong setup cost me an entire batch of scrap parts. Ever since then, I treat the test run like it’s part of the job—not just a formality.
Start Slow
Begin by loading your material into the press. Use manual mode, like jog or inching mode.
These modes let the machine move slowly—just a bit at a time. That way, you can see exactly how the die is coming down on the material.
You’re looking for smooth contact, proper alignment, and clean forming. If anything looks off—stop and fix it.
This first part tells you a lot.
Run 3 to 5 Test Pieces
One piece isn’t enough. Small problems don’t always show up right away. That’s why I always run at least three, sometimes five.
As each piece comes out, take your time to inspect it.
Here’s what to look for:
- Shape: Is the part forming the way it should?
- Size: Use calipers or gauges to check the part dimensions
- Burrs: Run your hand along the edge—are there rough or raised spots?
- Cracks or tears: Look at bends or corners for signs of stress
If you find any issues, go back and tweak the die or press settings. You might need to change the stroke length, adjust the force, or slow the feed rate. Small changes here can make a big difference.
Confirm Your Tolerances
Tolerances are the allowed limits for a part’s size, shape, and fit.
Every part has a range it needs to fall within—too far outside, and it won’t work or won’t pass inspection.
Here’s what to do:
- Check your stamped part against the part drawing or sample spec
- Use tools like calipers, micrometers, or go/no-go gauges
- Look at overall size, hole placement, edge finish, and part thickness
If the part is:
- Too big or too small
- Bent in the wrong spot
- Just not matching the spec
Don’t skip this step.
Even if things “look okay,” test runs give you proof that everything is dialed in. Once you’re confident, you can move to full speed without guessing.
It takes a few extra minutes—but it saves you hours of rework later.
Step #5: Start the Stamping Process
Once your test run checks out, it’s time to move into full production.
This is the part that feels exciting. The press starts running. The parts start piling up. But here’s the thing—don’t step back and zone out. I’ve seen good setups fall apart fast just because no one was paying attention.
Load the Material
Start by loading your raw material into the machine. This could be coil or pre-cut sheets, depending on your setup.
There are two ways to feed the press:
- Automatic feed: The machine pulls coil material through on its own. You just set the length and let it go.
- Manual feed: An operator loads one sheet or blank at a time. This takes longer but works well for small jobs or thick parts.
If you’re using progressive dies, the press will pull the material through each station. Each hit adds a feature—bend, cut, hole—until the final part drops out. It’s smooth once it’s going.
With manual feed, you’ll insert one blank, press the button, remove the part, then repeat.
Run the Press Continuously
Once the material is loaded and everything’s aligned, start the press in full production mode.
But don’t just walk away. You’ll need to keep an eye—and ear—on things as they move.
Monitor While You Work
Stay alert for any of these signs:
- Change in press noise: If it suddenly gets louder, clicks, or grinds, stop and inspect. Something might be off.
- Part inconsistency: If parts start looking different from the test run, pause and check the die or material.
- Machine temperature: Long runs can heat things up. If the press gets too hot, it might throw off alignment or cause wear.
Watch how the feed system is performing. A shift in feed accuracy can cause a mis-hit, especially with progressive dies. Even one small move out of place can damage the tool.
Keep It Steady
Stamping is repetitive—but every press matters.
If you stay focused and keep checking your parts, you’ll spot problems early and save a lot of time. That’s something I’ve learned the hard way—and now you don’t have to.

Step #6: Remove and Collect Finished Parts
Once the press is running smoothly and your parts are coming out clean, it’s time to focus on the final step—removing and collecting the finished pieces.
This part might seem simple, but it’s more important than people think. I’ve seen jobs fall apart here. Parts got scratched, bent, or even mixed up because no one planned the collection process. After all that work, the last thing you want is damage to the finish line.
Know Your Setup
How you collect parts depends on the kind of feed system you’re using.
- Automatic feed: Most presses drop the finished part onto a tray, conveyor, or bin. Make sure that area is clear and padded if needed.
- Manual feed: If someone is loading blanks by hand, they’ll also be removing the finished parts. This gives you a chance to check each one as it comes out.
No matter the setup, make it easy and safe for the operator.
Handle With Care
Stamped parts may still be warm. Some may have sharp edges. If you’re working with delicate shapes or thin material, they can bend or warp if they’re stacked too fast or dropped too hard.
Here’s what helps:
- Use soft trays or bins to avoid scratches
- Separate layers if the parts can’t be stacked
- Wear gloves to prevent oil or fingerprints on the surface
I once skipped the padding and ended up with a bin full of scratched stainless parts. We had to re-polish every single one. That taught me to treat the output like it’s already headed to the customer.
Inspect As You Collect
Take a quick look at each part during removal. You don’t need a deep inspection—but you can spot a lot just by glancing.
Watch for:
- Shape or bend issues
- Burrs or sharp edges
- Surface dents or marks
If anything looks off, pause the press and check your die and settings.
Finishing strong means more than just running the press. It’s about getting the part from the machine to the bin without damage.
Be present. Handle carefully. And if something looks wrong—stop and fix it before the next part drops.
Step #7: Inspect the Parts for Quality
This is where your work gets tested. You’ve run the machine, shaped the metal, and collected the parts. Now, it’s time to check if they meet the mark.
I’ve skipped this step before—thinking the parts looked fine—and later had them rejected. That’s a tough lesson to learn. So now, I always inspect. Every time.
What You’re Checking For
During inspection, you’re looking for more than just “does it look right?” You’re checking for:
- Burrs: Small, sharp edges left after cutting
- Cracks or distortion: Bends or damage not in the design
- Size accuracy: Parts should match the exact dimensions in the drawing
These are signs of wear, poor alignment, or changes in material. Even one of these issues can lead to problems later in assembly.
Tools to Use
Don’t guess—measure. Use tools that give you clear numbers.
Common ones include:
- Calipers: For measuring length, width, and depth
- Micrometers: For checking tight tolerances
- CMM (Coordinate Measuring Machine): For detailed, high-precision parts
At MachMaster, we use calipers for basic checks and CMMs for more complex jobs—especially when customers require tight tolerances, like ±0.01 mm. The better the tools, the better the results.
How Often Should You Check?
Not every single part needs a full inspection—but you should check a sample from each batch.
A good starting point:
- For short runs: Inspect every part
- For high-volume runs: Sample 1 part every 100 pieces (or as agreed with your customer)
If your process is stable, you can sample less often. But always increase inspection if you spot issues.
Keep Records
If you’re working under a quality system like ISO 9001—or delivering to a client with standards—you’ll need to document your inspection.
That means recording the part number, measurements, and date. Keep it clear and simple. I like to use a checklist or spreadsheet to stay organized.
Step #8: Clean and Maintain the Equipment
Once the stamping job is done, it’s easy to just shut off the machine and walk away. I’ve done that before—just wanting to be finished. But every time I skipped cleanup, I paid for it later.
If you want your tools to last and your next job to run smoothly, cleaning and maintenance matter. A lot.
Clean the Stamping Die
Start with dying. It takes a beating during production, and metal shavings often build up between cycles. If you leave them there, they can scratch the die or throw off the next part.
Here’s what to do:
- Brush off or vacuum any leftover bits
- Wipe down the die surfaces with a clean cloth
- Look for damage: Check for small chips, cracks, or uneven wear
Even a small crack can grow over time and ruin future jobs.
Wipe Down the Machine
Next, clean the stamping press itself. You don’t have to go overboard—just keep it in good shape.
- Wipe off oil or dust from flat surfaces
- Lubricate moving parts like the ram, guide posts, or feed rollers
- Check hoses, belts, and safety guards while you’re at it
This only takes a few minutes, but it helps prevent small issues from turning into big ones.
Log Your Maintenance
Every time you clean or check something, write it down.
I like to keep a simple log with the date, the task, and any issues I find. If something breaks later, I can go back and see what’s been done—and what was missed.
If you’re working under a quality system or in a shared shop, this record also helps others stay informed.
Conclusion
I told you how I rushed my first stamping job and messed it up. That doesn’t have to be your story.
Now you know what stamping really takes—from prepping material to inspecting parts. You’ve seen how each step matters.
So here’s the question: What’s stopping you from starting the right way today?
Stamping doesn’t have to be guesswork. It just takes process, care, and attention.
Contact us today if you want guidance or support. I’ll help you get it right—step by step.
Dive Deeper Into Our Resources
If you’re looking for more insights, we’ve put together a list of helpful articles that you might enjoy:
Still haven’t found what you’re looking for? Don’t hesitate to contact us. We’re available around the clock to assist you.